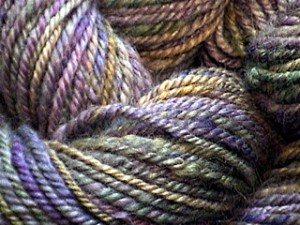
Setting the twist is a method for relaxing over-twisted, curling singles, and unbalanced plied yarns. The simplest way to set the twist is to soak the yarn in warm water. After you remove the skein from the water, roll the skein in a large towel and squeeze out the excess water. Let the skein hanging freely from your hand to test its balance. If it doesn’t twist around itself or at least very little, it is a balanced yarn. This yarn will be best used for knitting. If there is still a considerable amount of twist, hang the skein to dry with a little tension applied, like a small weight. Be sure not to apply to much weight that will over stretch and damage the yarn. To note, adding tension will straighten the skein, and also remove some of the loft and elasticity. Tensioned yarns are ideal for yarns designed for weaving. Therefore, it is important to consider how the yarn will be used when deciding what method to use for setting in the twist.
“Setting In The Twist” Of Handspun Yarn
What do I do if?...
The leader won’t wind onto the bobbin
- Tie the leader tighter onto the bobbin, and wind on a couple of inches by hand.
The yarn is over-twisting
- Tighten the tension on the drive band or the Scotch tensioner.
- Use a longer draft of the fiber.
- Use a larger whorl size.
The yarn is winding onto the bobbin too quickly
Loosen the tension on the drive band or the Scotch tensioner. A slight adjustment is usually sufficient.
The yarn is snapping apart (corkscrewing)
- Tighten the tension on the drive band or the Scotch tensioner, for a quicker draw on.
- Slow down your treadling.
- Stop treadling and draft out more fiber to use up the excess twist.
There are soft spots in the yarn
- Loosen the tension on the drive band or the Scotch tensioner, in order to put more twist into the yarn.
- Use a smaller whorl size
The joins are too weak, and pull apart
The new lock of fiber must overlap by at least 2 inches; up to 5 inches when using the long draw technique.
- Leave at least 2 inches of the yarn unspun. Do not try to add new fiber on yarn that is already spun. If the yarn breaks, untwist 2 inches of it before joining new fiber.
- Pinch the joined area to add the sufficient amount of twist before winding on.
- Watch to ensure the joined fibers are connecting.
Copyright 1999-2025 The Joy of Handspinning. All rights reserved.


